Inventory Management
How to add, edit, and remove cards from your CardBndr inventories — one at a time or in bulk.
Whether you’ve just imported a collection for the first time or you’re slowly cataloguing cards one by one, this guide walks you through the three things you’ll do most often: adding a card, editing its details, and removing it when it’s time to let it go.
Before You Start: Picking Your Inventory
CardBndr supports multiple named inventories — think of them as separate binders. Before doing anything, make sure you’re working in the right one. The active inventory’s name is shown in the header at the top of the app.
To switch, head to the Inventory tab and use the inventory selector on the left panel. Clicking “Set Active” on any inventory makes it the default across the whole app. You can also just browse a different inventory’s cards without changing the active one — handy for comparing two collections.
Tip: Need a fresh inventory? Type a name in the input field at the top of the inventory list and hit Enter (or the Create button). It’ll switch you to the new inventory straight away.
Adding a Card
There are two ways to get cards into an inventory: one at a time from the Database tab, or all at once via import.
Option A — Add from the Database
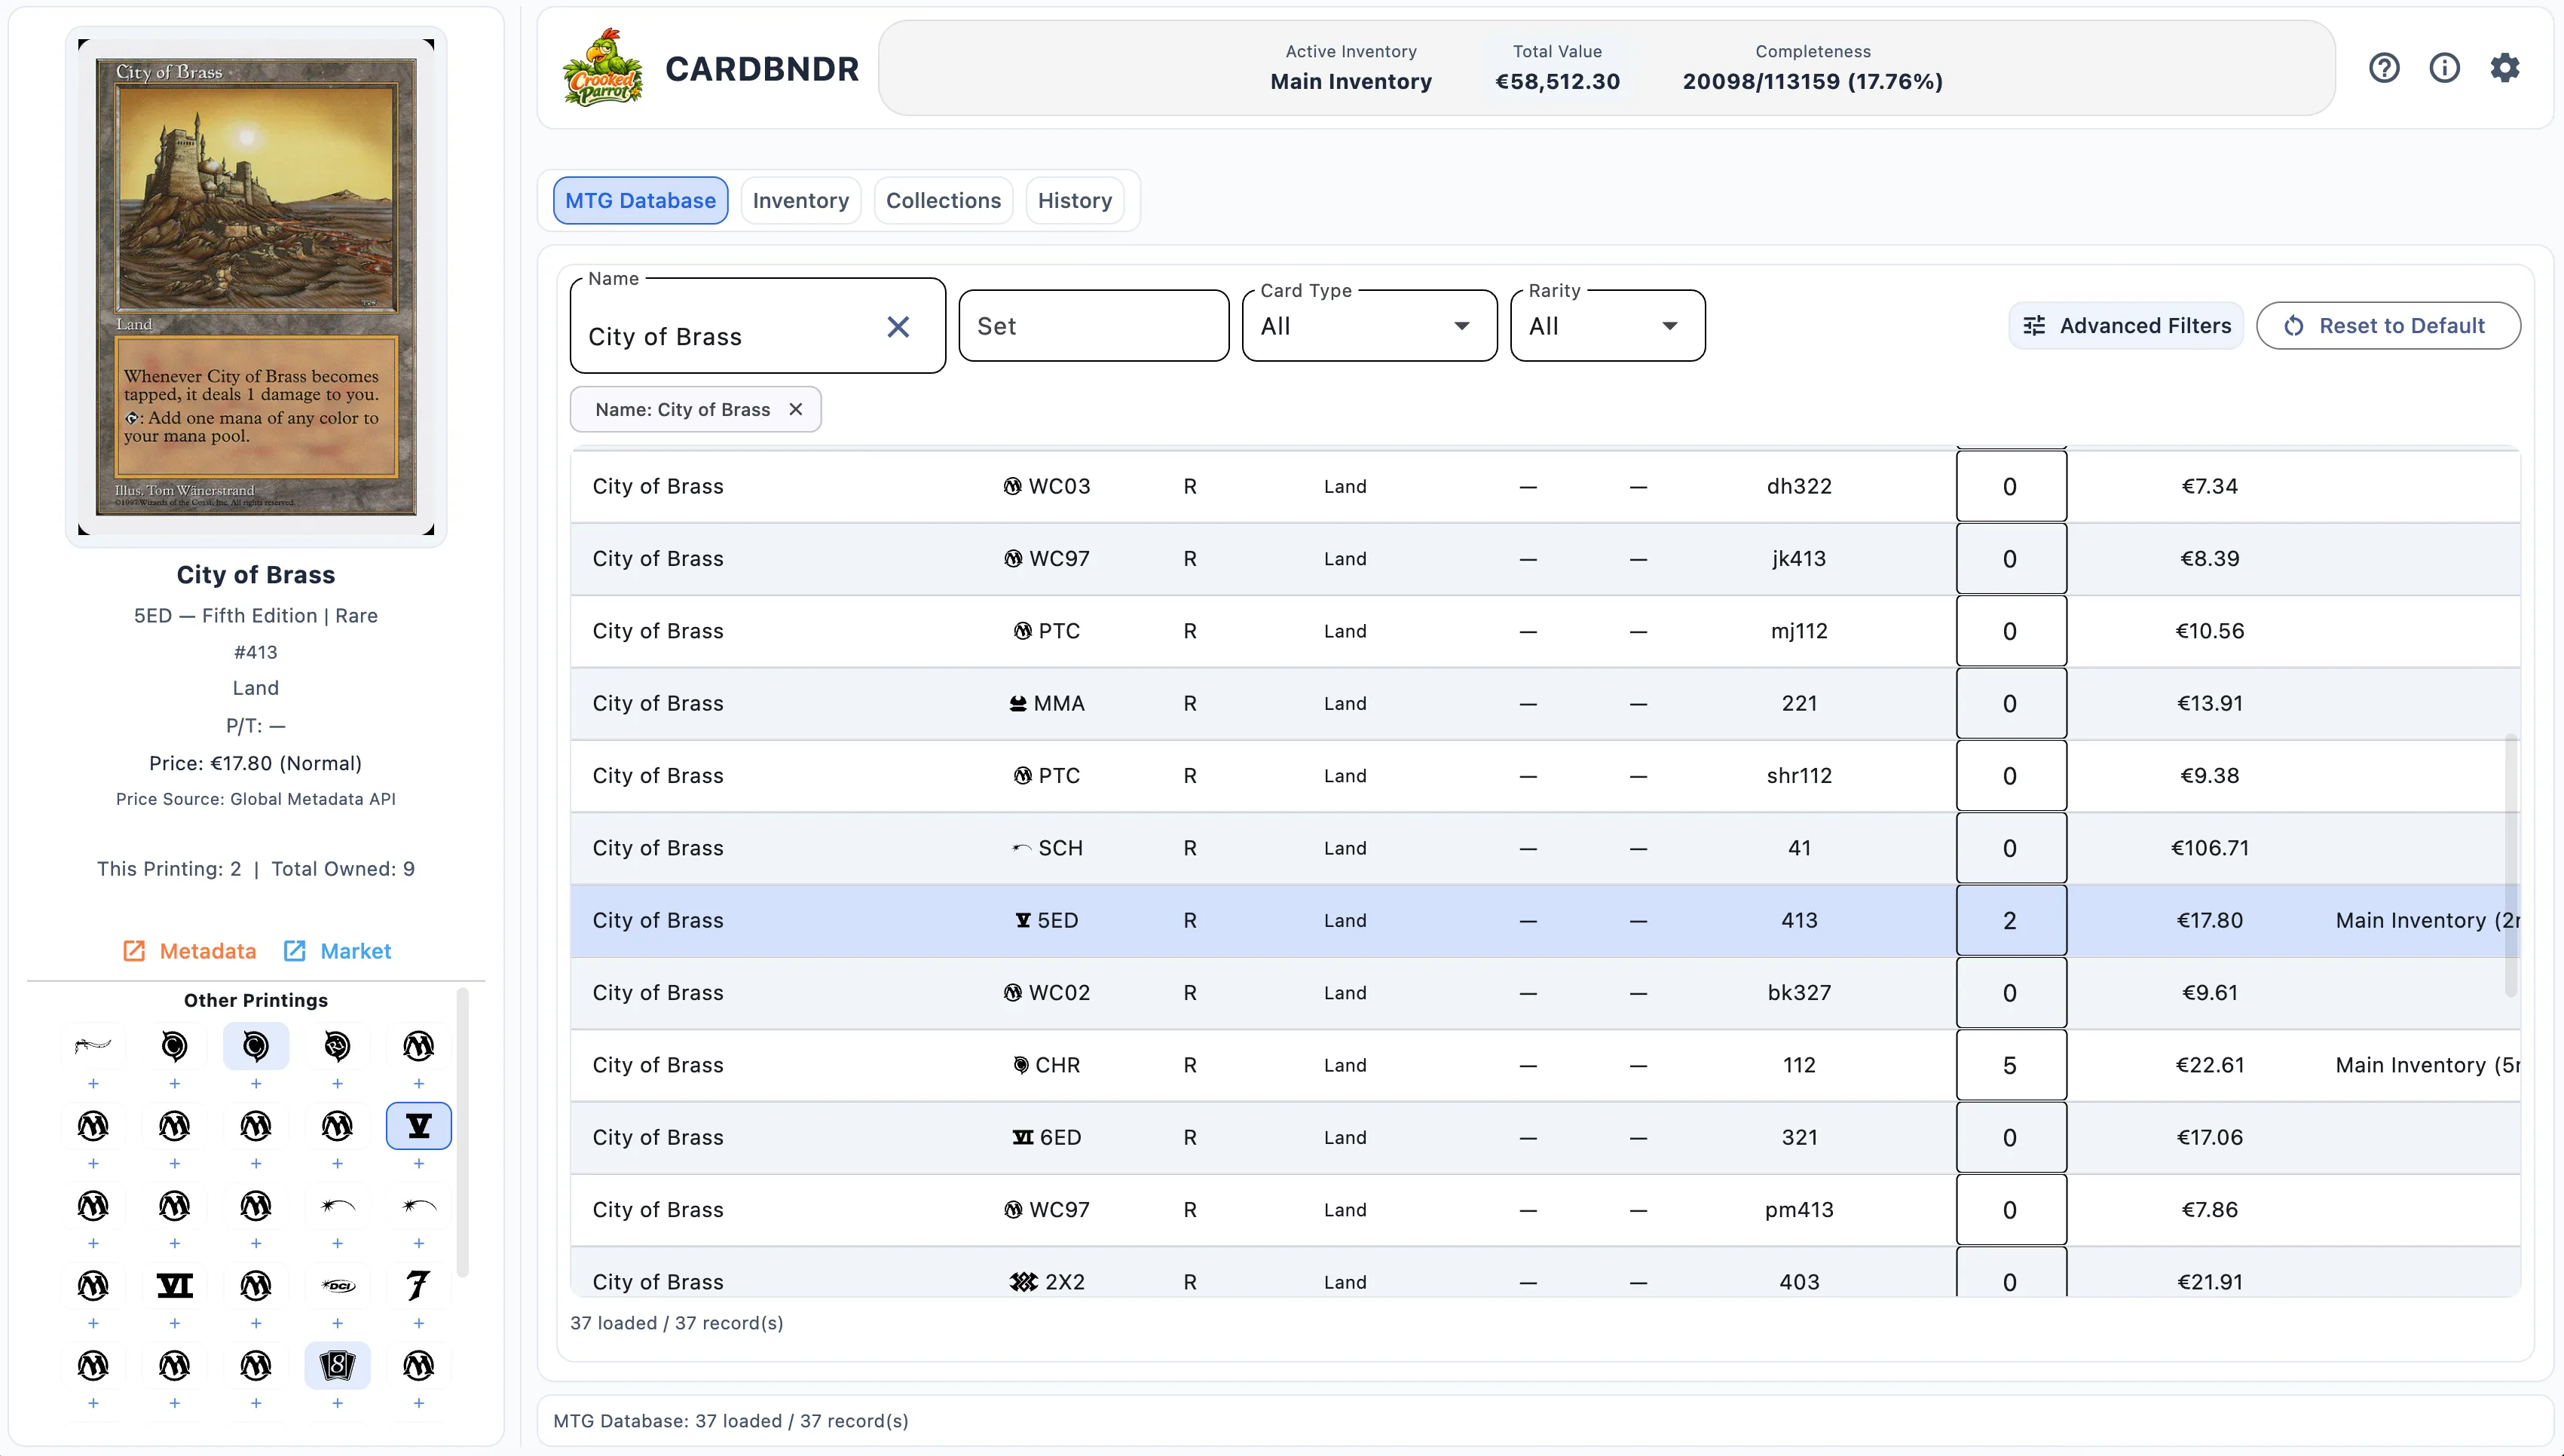
The Database tab is your full card catalogue — every card CardBndr knows about. Finding a specific card and adding one copy to your active inventory takes about three clicks.
-
Go to the Database tab.
-
Search for the card using the name field at the top. Type at least 3 characters and autocomplete chips will appear below the field — click one to jump straight to that card.
-
Click the card’s row in the table. This opens the Card Management dialog.
-
In the dialog, choose the finish you own using the dropdown:
- Normal — standard non-foil copy
- ✦ Foil — foil treatment
- ⧫ Etched — etched foil treatment (where available)
The price display updates automatically when you change the finish.
-
Hit “+1 Add”. The card is added to your active inventory with a quantity of 1. The stock summary in the dialog updates immediately.

Repeat the last two steps if you want to add more copies in a different finish.
Option B — Bulk Import
If you’re migrating from another app or received a collection list, import is the way to go.
- In the Inventory tab, click the Import button in the left panel.
- A format picker dialog appears. Choose either:
- XML — Magic Assistant compatible (the standard export format from Magic Assistant)
- CSV — CardBndr flat export (files exported from CardBndr itself)
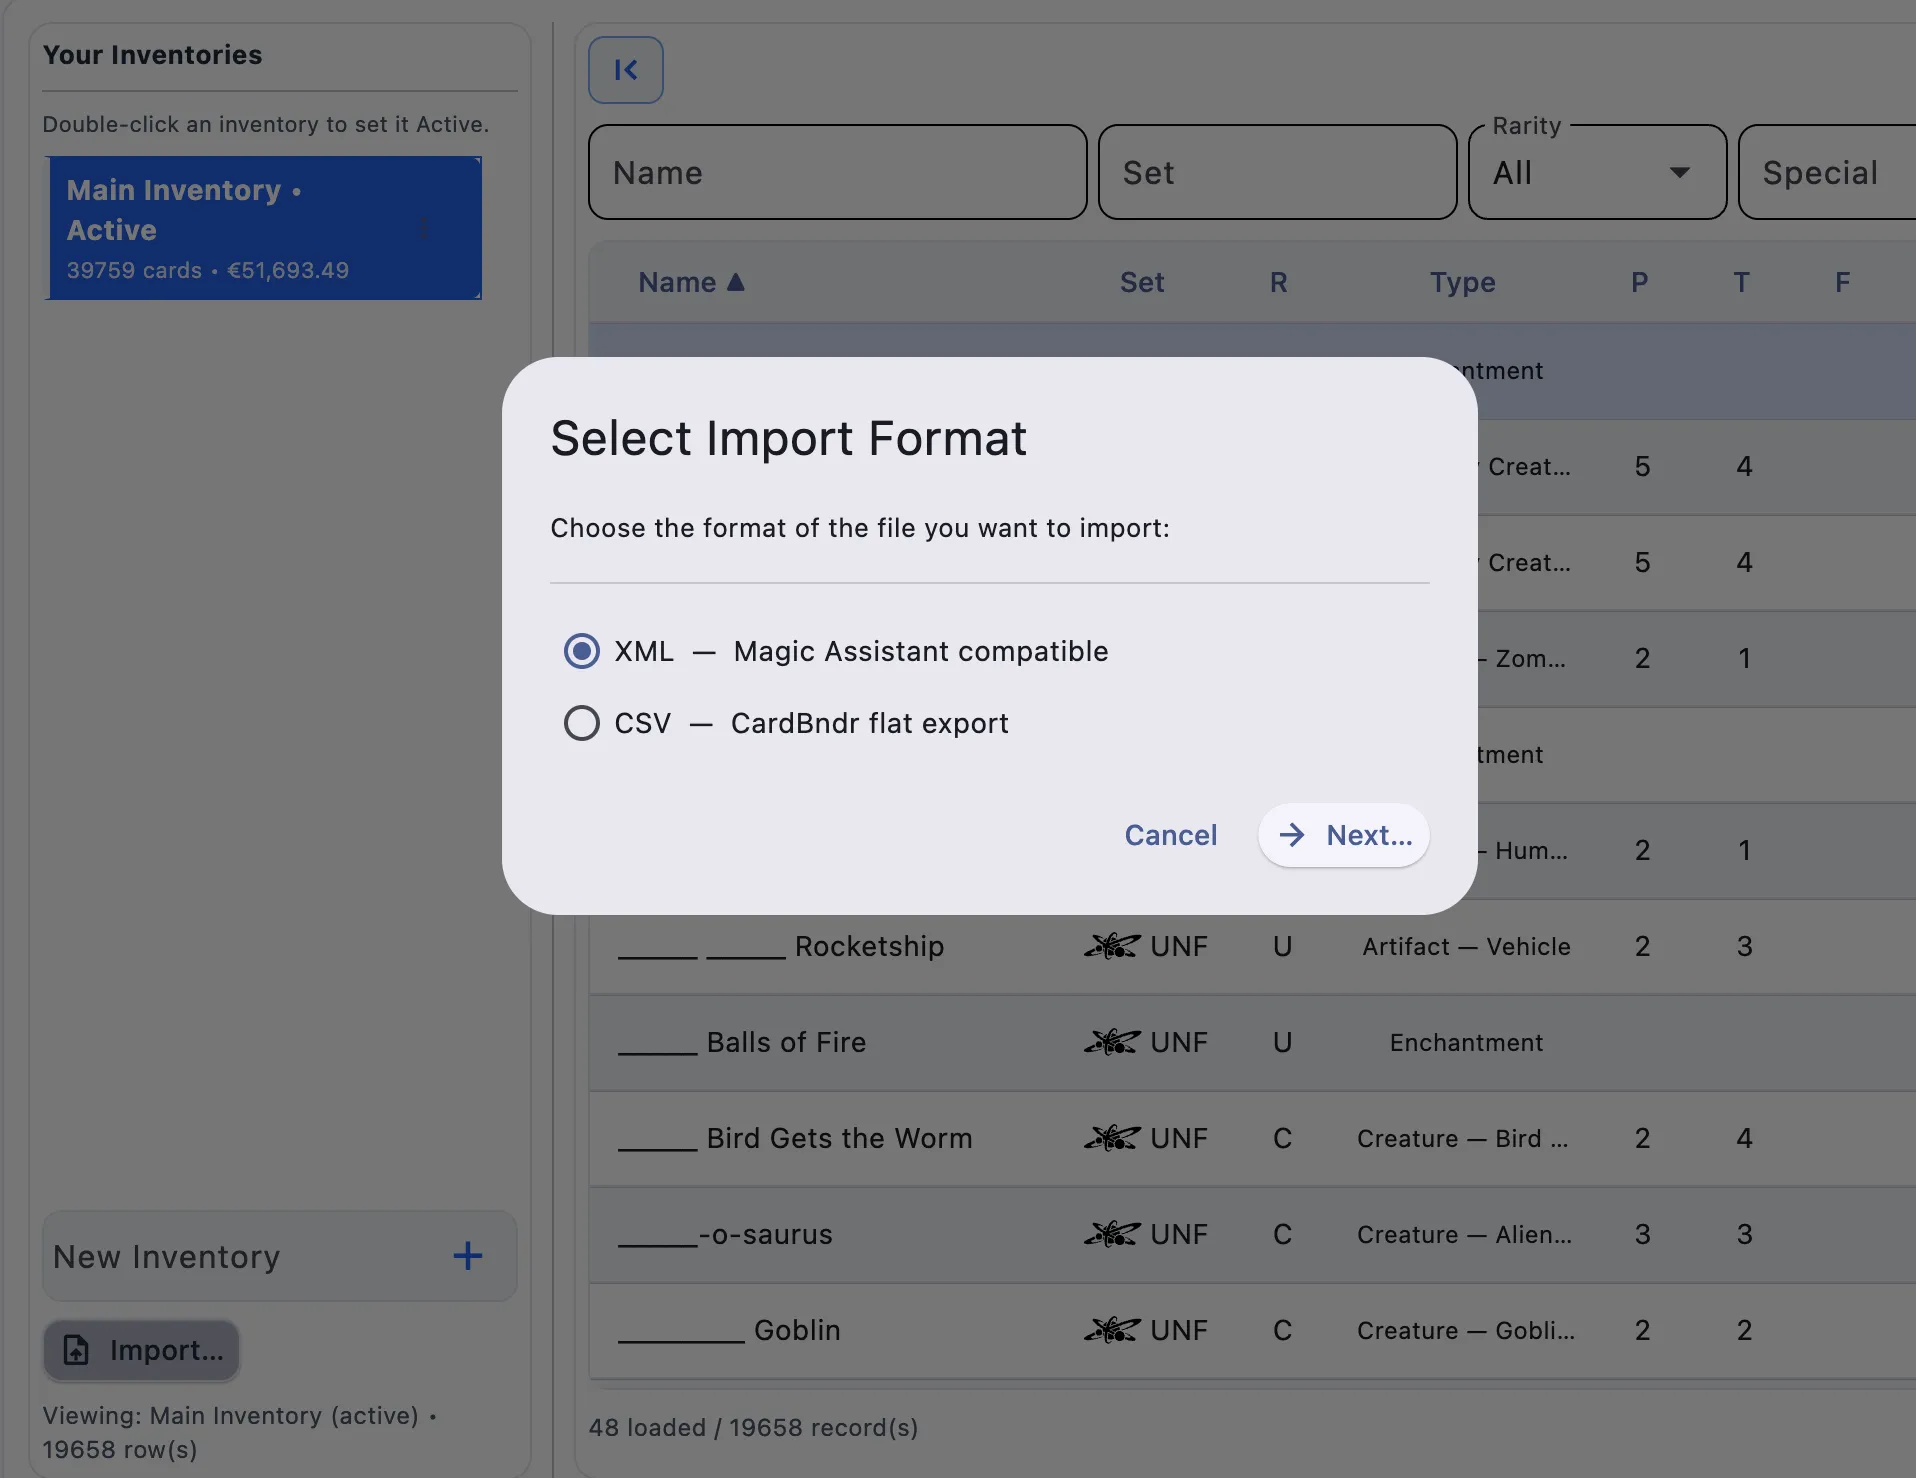
- A native file picker opens. Navigate to your file and confirm.
CardBndr will parse the file, match each card against its database, and add the entries to the currently selected inventory. Finish information from the file is respected — Normal and Foil copies of the same card stay as separate entries. A snackbar notification confirms the import when it’s done.
Note: If a row in the file can’t be matched (e.g. unknown set code), CardBndr skips it and logs the error rather than aborting the whole import. Check the History tab afterwards if you think something might have been missed.
Editing a Card’s Details
Cards don’t just have a quantity — you can also attach notes, override the market price, and track exactly where a card is stored.
- Go to the Inventory tab and find the card you want to edit. Use the name field, set search, or the Advanced Filters button to narrow things down if your inventory is large.
- Click the card’s row. This opens the Card Management dialog in inventory mode.
Changing the Quantity
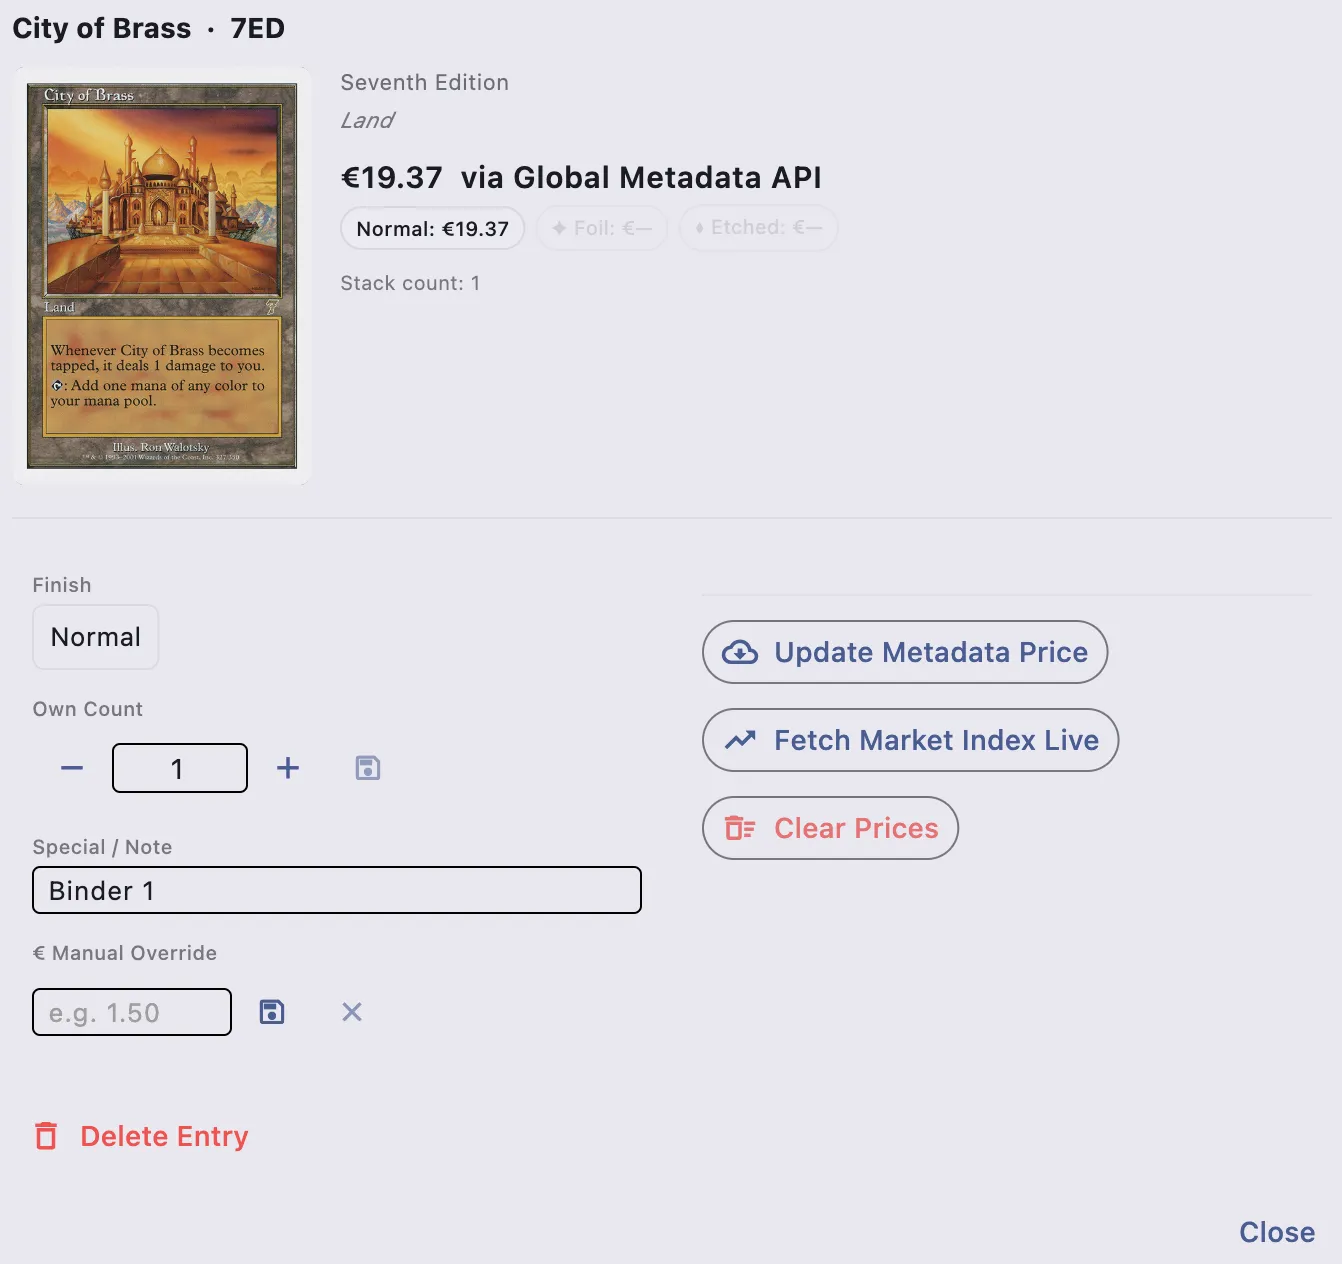
Inside the dialog you’ll see the current copy count with ”−” and ”+” buttons on either side. Click them to adjust — the count saves immediately without closing the dialog, so you can bump it up several times in a row without reopening anything.
Adding a Note or Condition
The Special / Notes field below the count is a free-text multiline box. Use it for anything: condition notes (LP, slight edge wear), storage location (Binder 3, page 12), trade status (Reserved for Rafa), or anything else you care about tracking.
Just click into the field, type your note, and click Save (or close the dialog — the field auto-saves on blur). Notes show up as a truncated label in the inventory table, with the full text available on hover.
Overriding the Price
Sometimes the market price from the live market index isn’t what you actually paid or what you’d accept for a trade.
- In the dialog’s Manual Price field, type the value you want (in your configured currency — EUR or USD, set in Settings).
- Click Save. The override is stored against this specific card entry and shown in the price column with a
(manual)label. - Changed your mind? Click Clear next to the field to go back to the live market price.
Caution: The finish displayed in this dialog is locked to the finish the card was added with. If you added a card with the wrong finish, delete it and re-add with the correct one.
Deleting a Card
Removing a card is a two-step process by design — just enough friction to stop accidental deletions.
- Open the Card Management dialog for the card (click its row in the Inventory tab).
- Scroll to the bottom of the dialog. You’ll see a Delete button in red.
- Click Delete. The button row is replaced by a confirmation prompt: “Confirm delete?” alongside Cancel and Confirm buttons.
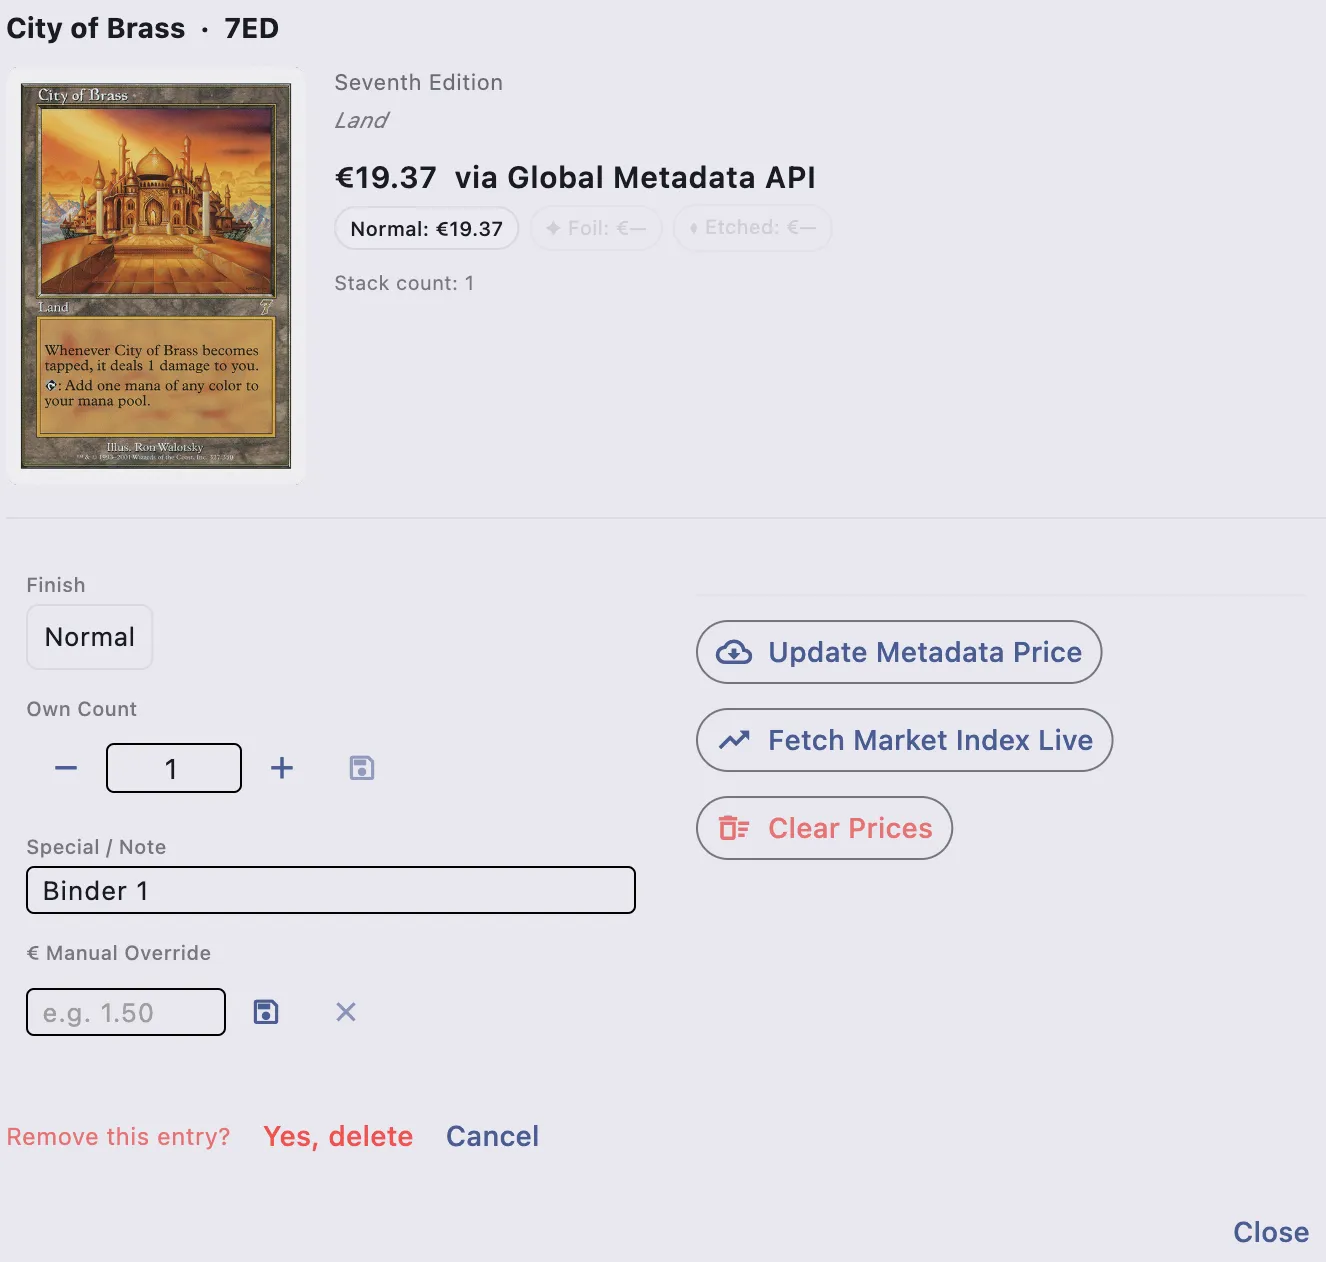
- Click Confirm to remove the card from the inventory permanently.
The dialog closes automatically and the table refreshes. The History tab logs the removal, so you always have a record of what was deleted and when.
Clearing an Entire Inventory
If you need to wipe all cards from an inventory (but keep the inventory itself), there’s a dedicated Clear All Cards option in the inventory list’s context menu. Like single-card deletion, it asks for confirmation before doing anything irreversible.
Warning: Clearing an inventory cannot be undone. Export a backup first if there’s any chance you’ll want the data back.
Quick Reference
| Task | Where | How |
|---|---|---|
| Add one card | Database tab → row click | Choose finish → “+1 Add” in dialog |
| Bulk import | Inventory tab → Import button | Choose XML or CSV → pick file |
| Edit quantity | Inventory tab → row click | Use ± buttons in dialog |
| Add a note | Inventory tab → row click | Type in Special / Notes field |
| Override price | Inventory tab → row click | Enter value in Manual Price field |
| Delete a card | Inventory tab → row click | Delete → Confirm |
| Clear all cards | Inventory tab → context menu | Clear All Cards → Confirm |